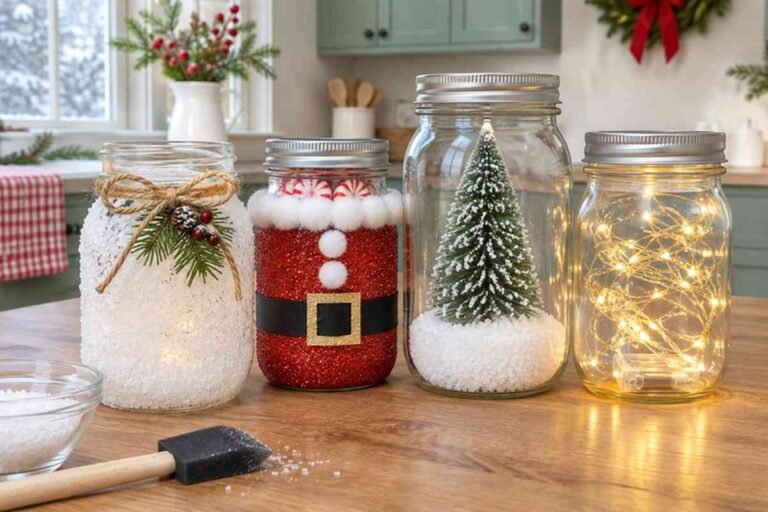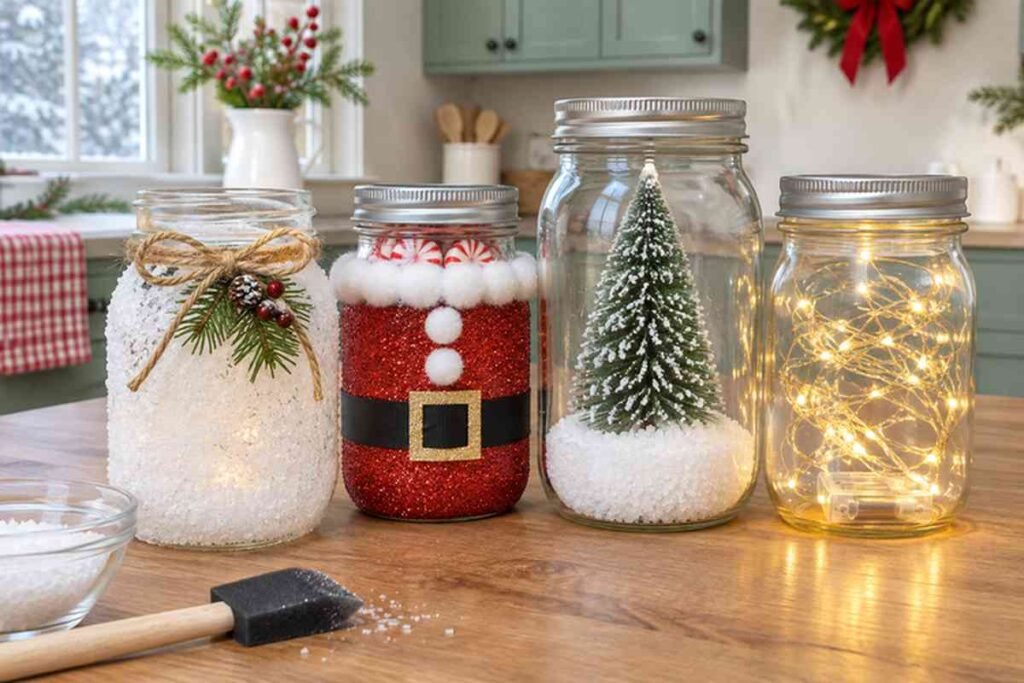
The easiest Mason jar Christmas crafts are salt snow frosted jars, glitter treat jars, a dry snow scene, fairy light jars, a paper village jar and gift jars. You can make all six from the same short supply list: clean jars, Mod Podge, salt, ribbon and battery lights.
That shared list is the whole trick for a busy December. You buy once, you set up one table, and your kids can bounce between projects while the glue dries. You won’t need a sewing machine, a drill or a craft store loyalty card.
I’ll flag the steps a child can own and the ones you’ll want to keep for yourself.
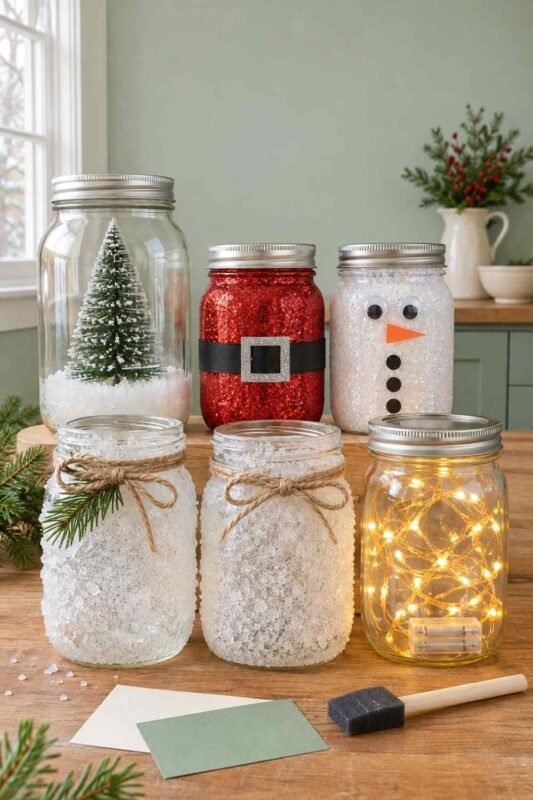
Mason Jar Christmas Crafts From One Shopping Trip
One supply run covers every jar craft below, because the same five things keep showing up: jars, a clear-drying glue, coarse salt, ribbon or twine, and battery fairy lights. Glitter, googly eyes and paper are the only extras, and you’ve probably got paper already.
- Jars: pint (16 oz) jars for treat jars and luminaries, quart (32 oz) jars for snow scenes, and 4-ounce jelly jars for little gifts. Baby food jars work too, and they’re free if you’ve got a toddler.
- Glue: Mod Podge or any craft glue that dries clear. A cheap foam brush beats a nice paintbrush here.
- Salt: coarse kosher salt for the snow look. Table salt works, it just looks finer.
- Trim: jute twine, red ribbon, a few pine sprigs or faux berries.
- Light: battery LED fairy strings with a small switch box that fits through the jar mouth.
- Extras: red, white and brown glitter, googly eyes, a pom-pom, a pipe cleaner, card stock.
Here’s how the six crafts share that list, and how long each one has to sit before you can call it done.
| Craft | Uses from the shared list | What a kid can do | Wait before it’s done |
|---|---|---|---|
| Salt snow frosted jar | Jar, glue, salt, twine | Sprinkle the salt | About 10 to 20 minutes in a warm spot, per A Piece of Rainbow |
| Treat jar (Santa, snowman, reindeer) | Jar, glue, glitter, ribbon | Pour glitter, stick on eyes | Until the glitter layer is fully dry |
| Dry snow scene | Quart jar, salt, small figures | Pour the salt “snow” | Only the figure glue |
| Fairy light jar | Any jar above plus a light string | Switch it on, drop it in | None |
| Paper village jar | Jar, card stock | Draw, color and cut | None |
| Gift jar | Jar, ribbon, a filling | Write the tag | None |
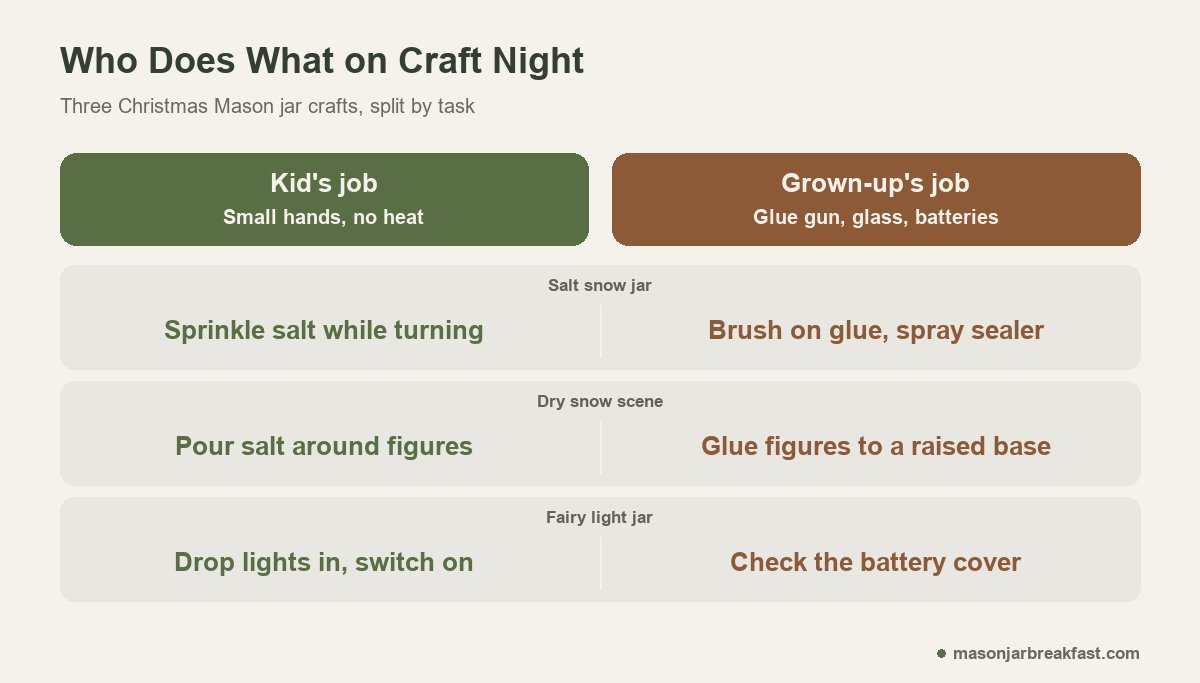
Start the glue jars first. By the time your paper village is cut out, the salt jars are ready for twine!
Salt Snow Frosted Jars
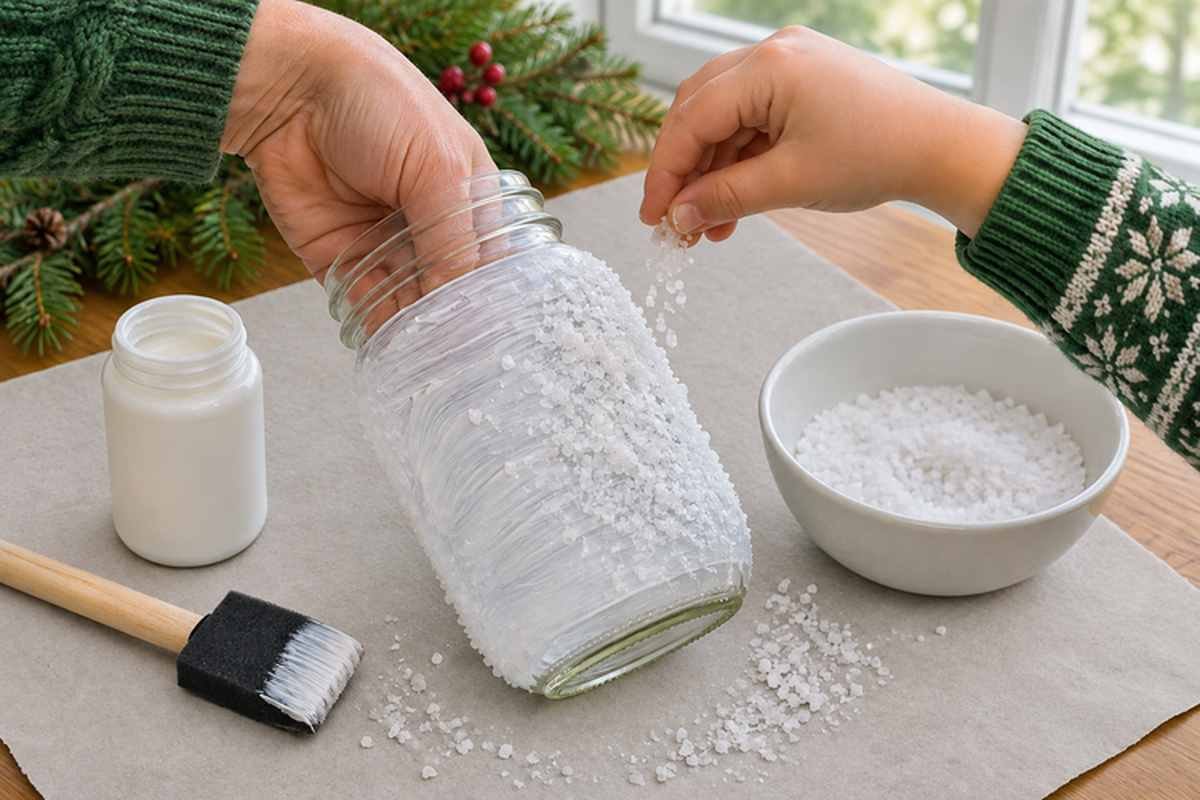
Salt snow frosted jars are made by brushing Mod Podge over the outside of a jar and sprinkling coarse salt onto the wet glue. The crafter behind A Piece of Rainbow uses Morton coarse kosher salt and says the jars dry in 10 to 20 minutes somewhere warm.
- Wash and dry the jar. Any grease from little fingers keeps the glue from grabbing.
- Brush on a thick, even coat of Mod Podge. You want no bare spots and no drips.
- Work fast. Hold the jar by the inside and have your helper sprinkle salt while you turn it.
- Set it aside and don’t touch the coated side until it’s dry.
- Brush off the loose salt, then tie twine around the rim and tuck in a sprig of greenery.
The step that goes wrong is the weather. A reader in a damp area wrote on that same tutorial that the salt coating softened and ran, and she switched to finely grated foam packaging beads instead.
Another reader sprays the finished jars with clear acrylic to lock the salt in, and says hers have lasted for years. If your house runs humid, you’ll want that spray, and it’s a grown-up job you should do outside.
Want the snow on the inside so the outside stays smooth? Readers asked, and the answer on the tutorial was yes, you can, and it looks just as nice.
Santa, Snowman and Reindeer Treat Jars
Treat jars are the craft I’d hand to the youngest kid at the table. Crazy Little Projects covers a jar in decoupage glue, pours glitter all over it, then turns it into a character.
There are three to choose from: a red Santa with a black ribbon belt, a white snowman with googly eyes, or a brown reindeer with pipe cleaner antlers on the lid. Each one takes a single color of glitter.
- Santa: red glitter, a strip of black ribbon, and a square buckle cut from silver foam or card.
- Snowman: white glitter, two googly eyes, a paper carrot nose and a smile of tiny black beads.
- Reindeer: brown glitter, googly eyes, a red pom-pom nose and a pipe cleaner bent into antlers.
Fill them with wrapped candy, cocoa packets or pencils. Before you gift them, know this: a reader asked if the jars are washable, and the answer was that they wouldn’t hold up well. So they’re treat holders, and they don’t go in the dishwasher.
Budget swap: skip the big jars. Baby food jars or 4-ounce jelly jars use a fraction of the glitter, which matters when you’re making a whole classroom set. Your vacuum will thank you too!
A Dry Snow Scene That Never Leaks
A dry snow scene is a jar with small figures glued inside and salt poured around them as snow, with no water at all. You skip the leaking, cloudy water and sealed lid of a classic snow globe, so it’s a safer first project with kids.
The best tip I found for it came from a crafter answering a question about a Mason jar snow scene:
“Use some glue to keep the figures in place and then pour sand or salt. If the jar moves, the sand will move but then go back in place. If you need the figures to be higher from the bottom so you can pour a good amount of sand, glue them to some base (like a piece of wood, a bottle cap, a little rock) and then to the bottom of the jar.”
– r/crafts, December 2021 (3 upvotes)
Don’t skip that raised base.
Without it, the salt buries your little tree up to its branches, and the whole scene just looks like a jar of salt. A bottle cap is enough lift for a small figure; a taller tree may need a flat pebble or a wood slice underneath.
- Pick a wide-mouth quart jar so a grown-up hand fits inside.
- Hot glue a bottle cap or a flat pebble to the bottom, then glue a bottle-brush tree or a small figure on top of it. Hot glue is a grown-up step.
- Let your helper pour coarse salt or Epsom salt around the base until it looks like a snowdrift.
- Screw the lid on. Paint it white or wrap the band in ribbon if you like.
Want the shaking, floating kind instead? That’s a water snow globe, and it’s a different build with a sealed lid. Make the dry version first and see if your kids even care about the shake.
Fairy Light Jars Without a Flame
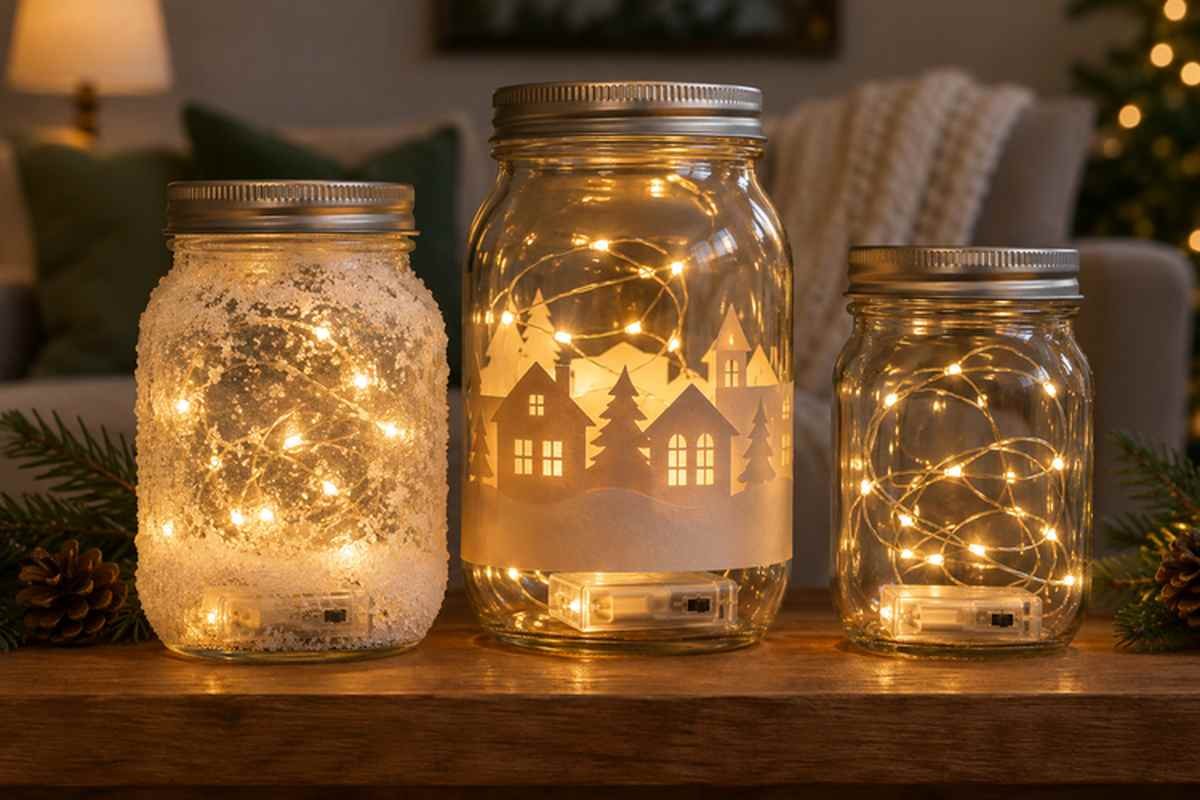
To make a Mason jar with fairy lights, switch on a battery LED light string and coil it into the jar, letting the small battery box sit at the bottom.
The National Fire Protection Association says to use flameless candles at home, and its tip sheet names December as the peak month for home candle fires.
That’s why I’d only light these jars with batteries. Salt, glue, twine and dry greenery can all burn, and you don’t want a real flame sitting in a jar full of them.
NFPA’s candle tip sheet also says to keep any lit candle at least 1 foot from anything that can burn and never to leave a child alone in a room with one.
Any jar above can become a light. The salt snow jars glow softly, the paper village throws little house shadows, and a plain jar with a string inside makes a quick nightlight for a kid who’s scared of the dark hallway. It’s the cheapest magic you’ll buy all month!
Two small things save you frustration. Buy strings with the switch on the battery box, not a remote you’ll lose by New Year’s. And check that the battery cover’s screwed shut before the jar goes anywhere little hands can reach.
A Paper Village Jar for the Littlest Helpers
A paper village jar needs no glue and no waiting, which makes it the right pick for preschoolers.
Draw a row of little houses and trees on one long strip of card stock, cut along the rooflines, and curl the strip inside the jar so it stands on its own.
Let your kids color the windows yellow. Drop a fairy light string in the middle and the whole village lights up from behind. When the season’s over, you slide the strip out flat and tuck it in an envelope for next year.
Jars That Double as Christmas Gifts
Plenty of these crafts are also gifts, and a filled jar is the cheapest present I know. If you’re making gifts this year, start with one of these:
- A snowman hot chocolate gift jar, layered with cocoa, marshmallows and candy, that’s easy to make in bulk for teachers and neighbors.
- A cookie mix in a jar, with flour, two sugars, oats and chocolate chips layered in a quart jar and a tag that tells them what to add.
- A mani-pedi in a jar for anyone who could use a quiet evening off.
- A Christmas Mason jar centerpiece that works as a hostess gift if you’re heading somewhere for dinner.
Mason jars have been a kitchen staple in my family since Grandma Florence filled them with home-canned green beans and tomatoes. Craft jars are a different job, though. Once you’ve put glue, glitter or paint on a jar, keep it with the decorations and out of the canning and food rotation.
FAQ
What is the Christmas jar tradition?
The Christmas jar tradition comes from Jason F. Wright’s novel Christmas Jars. His website calls it a 20-year-old tradition based on the novel and says his family gave away the first jar in 2004, a year before a publisher picked up the book.
Can I put a real candle in a decorated Mason jar?
A decorated Mason jar is safer with a battery light than a real candle. The National Fire Protection Association recommends flameless candles at home, and glue, salt, ribbon and greenery on the jar can all burn.
What Mason jar Christmas crafts are best for preschoolers?
The paper village jar and the glitter treat jars are the best Mason jar Christmas crafts for preschoolers. Both let small kids do the fun part, cutting, coloring or pouring glitter, while a grown-up handles hot glue and anything glass-heavy.
Store your salt jars somewhere dry over the summer, wrapped in tissue in a closed bin. The commenters on that salt snow tutorial agree that low humidity is what keeps them looking good for next year.
Related Posts



I love having dance parties in the kitchen with my family, traveling, and mason jar creations.
Follow on Pinterest