Mason Jar Breakfast

Not Your Grandma's Mason Jar Anymore!

  • Home
  • Recipes
    • Mason Jar Breakfast
    • Mason Jar Lunch
    • Mason Jar Dinner
    • Mason Jar Dessert
  • Crafts
  • Décor
  • Gifts
  • Beauty
  • About
  • Shop
  • Others
    • Auto
    • Business
    • Fashion
    • Food & Beverage
    • Health
    • Home Improvement
    • Immigration & Investment
    • Lifestyle
    • SEO Digital
    • Tech
    • Travel
How to Plan the Perfect Peru Trip

How to Plan the Perfect Peru Trip: A Step-by-Step Guide

Travel Leave a comment

How to Plan the Perfect Peru TripPeru consistently ranks among South America’s top travel destinations, and for good reason. Ancient ruins, dramatic landscapes, vibrant cultures, and incredible food create experiences that stick with travelers long after they return home. 

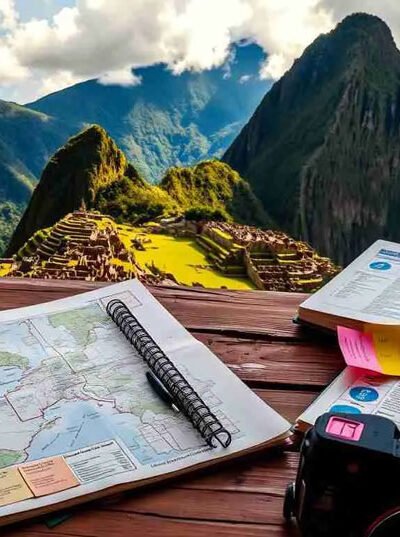
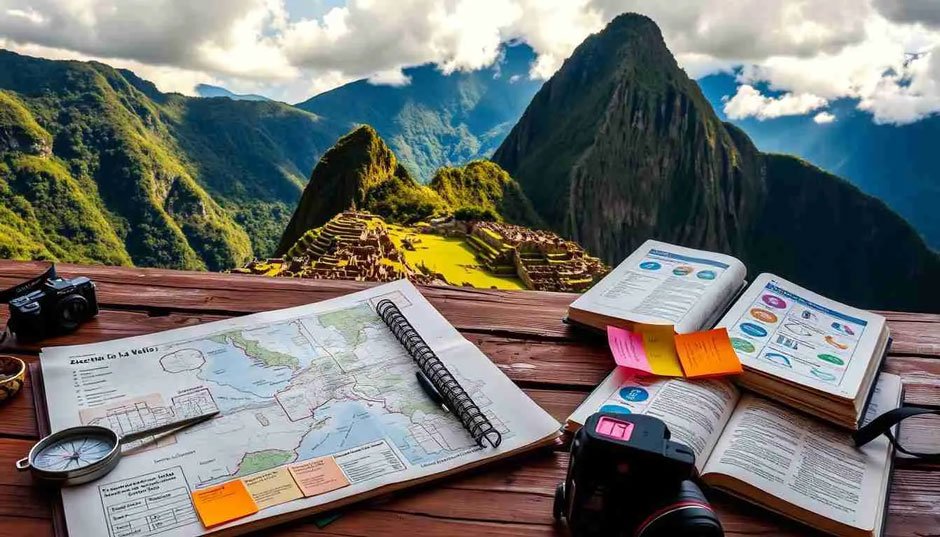
But planning a Peru trip can feel overwhelming with so many options and logistics to consider.

Most people focus entirely on Machu Picchu and miss out on the country’s other remarkable destinations. 

Others underestimate the physical demands of high-altitude travel or don’t budget adequately for the realities of South American travel costs. 

A little planning goes a long way toward avoiding common pitfalls and making the most of your time there.

Picking the Best Time to Go

Peru’s seasons are opposite to North America and Europe, with dry season running May through September. 

This period offers the most reliable weather for trekking and sightseeing, though it’s also peak tourist season with higher prices and crowded attractions.

Shoulder seasons (April and October) provide decent weather with fewer crowds. 

April can still have occasional rain, while October marks the beginning of rainy season but usually stays dry enough for most activities.

Rainy season from November through March brings heavy downpours, especially in the mountains and jungle regions. 

However, this period offers advantages like dramatically lower prices, lush green landscapes, and far fewer tourists. The Sacred Valley and Machu Picchu remain accessible year-round, though train schedules may be reduced.

Weather considerations by region:

  • Coast: Mild and dry year-round, though Lima can be gray and foggy June-October
  • Mountains: Dry season May-September, cold nights year-round above 3,000 meters
  • Amazon: Hot and humid always, wettest December-May
  • High altitude areas: Freezing temperatures possible any time of year

Budget and Logistics: Flights, Transport, and Stays

International flights to Lima typically cost $400-800 from major US cities, depending on season and how far in advance you book. Domestic flights within Peru are reasonably priced, usually $80-150 for routes like Lima to Cusco.

Ground transportation varies widely in quality and price. Tourist buses between major destinations cost $15-30 and offer reasonable comfort. Local buses are much cheaper but can be overcrowded and uncomfortable for long distances.

Accommodation spans from $10 budget hostels to $500+ luxury hotels. Mid-range options in the $50-100 range offer good value, especially in smaller towns outside Lima and Cusco where costs drop significantly.

Food costs depend heavily on where you eat. Street food and local restaurants charge $3-8 per meal, while tourist-oriented restaurants run $15-25. 

Markets provide cheap, fresh ingredients if you’re staying somewhere with kitchen access.

Many travelers find that organized Peru tours can actually provide better value than independent travel, especially when factoring in the cost of guides, entrance fees, and transportation between remote sites.

Must-See Highlights Beyond Machu Picchu

While Machu Picchu deserves its reputation, Peru offers numerous other archaeological and natural wonders worth including in your itinerary.

The Sacred Valley contains multiple Inca sites that are often less crowded than the main attraction. Ollantaytambo and Pisac feature impressive ruins with fascinating history, plus vibrant markets selling textiles and crafts.

Arequipa, Peru’s second-largest city, showcases beautiful colonial architecture built from white volcanic stone. The nearby Colca Canyon offers some of the world’s best condor watching and hiking opportunities.

Northern Peru gets overlooked but contains remarkable sites like Kuelap, a massive pre-Inca fortress that rivals Machu Picchu for dramatic setting and historical significance.

Lesser-known destinations worth considering:

  • Huacachina Oasis: Sand dunes and lagoon near Nazca
  • Chachapoyas: Cloud forest region with numerous archaeological sites
  • Iquitos: Amazon gateway accessible only by boat or plane
  • Rainbow Mountain: Colorful geological formation near Cusco
  • Sacsayhuamán: Impressive Inca stonework overlooking Cusco

The Amazon basin covers 60% of Peru’s territory and offers completely different experiences from the mountain regions. Iquitos and Puerto Maldonado serve as jumping-off points for jungle lodges and river excursions.

Staying Healthy and Safe in the Andes

Altitude sickness affects most visitors to Cusco and other high-elevation destinations. Symptoms include headaches, nausea, fatigue, and difficulty sleeping. Arriving a day or two early helps with acclimatization before attempting strenuous activities.

Drink plenty of water and avoid alcohol during your first few days at altitude. Coca tea, available everywhere in the mountains, helps some people manage mild altitude symptoms.

Standard travel precautions apply regarding food and water safety. Stick to bottled or purified water, avoid raw vegetables and fruits you can’t peel yourself, and be cautious with street food until your stomach adjusts.

Crime levels vary significantly by location and time of day. Tourist areas are generally safe during daylight hours, but petty theft remains common. Don’t display expensive items, use hotel safes for valuables, and avoid walking alone at night.

A One-Week Itinerary to Pull It All Together

Day 1-2: Arrive in Lima, explore the historic center, visit museums, enjoy the food scene. Take it easy to recover from international travel.

Day 3: Fly to Cusco early, spend the day gently exploring the city to acclimatize. Visit San Pedro Market and walk around the main plaza.

Day 4: Sacred Valley day trip visiting Pisac ruins and market, then Ollantaytambo. Stay overnight in the Sacred Valley to aid altitude adjustment.

Day 5: Train to Aguas Calientes, early bus up to Machu Picchu. Spend most of the day exploring, return to Cusco in the evening.

Day 6: Free day in Cusco for additional sightseeing, shopping, or day trips to nearby sites like Sacsayhuamán. This day also serves as a buffer in case weather affects Machu Picchu plans.

Day 7: Morning flight back to Lima, afternoon departure home or extend your trip to other regions.

This itinerary covers the essential highlights while allowing time for altitude adjustment and some flexibility for weather delays.

Related Posts

  • How to Declutter Before a Move
    How to Declutter Before a Move: A Step-by-Step Guide

    Clutter isn't always present in the space surrounding us. It starts from within. It begins…

  • A-Step-by-Step-Guide-to-Picking-the-Perfect-Senior-Living-Apartment
    A Step-by-Step Guide to Picking the Perfect Senior Living Apartment

    When life moves forward, having comfort and peace of mind matters most. Picking a senior…

  • Throwing a Backyard Party? Here’s Your Step-by-Step Planning Guide

    Hosting a backyard party is a fantastic way to gather friends and family, celebrate special…

  • What to Do After a Car Accident: A Step-by-Step Guide
    What to Do After a Car Accident: A Step-by-Step Guide

    Car accidents are an unfortunate reality on the road, and while no one ever expects…

Filed Under: Travel

Leave a Reply Cancel reply

Your email address will not be published. Required fields are marked *

Hi, I'm Yetta. I love having dance parties in the kitchen with my family, traveling, and Mason jar creations.

Follow on Facebook Follow on Pinterest Follow on Twitter Follow on Instagram

Recent Posts

My Stay Where Larnaca’s Shoreline Redefines Five-Star Calm
How to Find the Right Heating Contractor for Your Project
The-Importance-of-Sleep-in-Addiction-Recovery
Starting Your Professional Life in a New Country: The First 90 Days
Must-Try Culinary Experiences on a Spain and Portugal Tour
"This risk adjustment software will transform your operations," the sales rep promised. Eight months later, our coders were using Excel spreadsheets to track what the $400,000 system couldn't handle. The software worked perfectly, if your workflow matched their demo, your data was pristine, and your coders thought like programmers. None of those things were true. So we had a very expensive system that technically functioned but practically failed. The Workflow Mismatch The software assumed everyone codes the same way. Chart in, review it, code it, submit. Linear. Clean. Nothing like reality. Sarah likes to review all medications first, then look at notes. Kevin starts with most recent encounters and works backwards. Linda groups similar conditions and codes them in batches. The software forced everyone into the same rigid workflow. Productivity crashed 40%. We couldn't assign charts based on coder strengths anymore. The system distributed work "intelligently" using an algorithm nobody understood. Our cardiac specialist coder got pediatric charts. Our mental health expert got orthopedic cases. The AI was intelligent like a particularly dense brick. Simple tasks became complex ordeals. Reassigning a chart? Seven clicks through three menus. Adding a note? Navigate to a different module. Checking previous coding? Log into the audit portal. We spent more time navigating than coding. The Black Box Problem When the software suggested an HCC, we had no idea why. It just appeared: "Consider E11.42." Based on what? Which documentation? What logic? The vendor called it "proprietary AI." We called it guessing. Auditors don't accept "the AI said so" as supporting documentation. We need to know exactly where diagnoses come from. But the software wouldn't show its work. It was like having a coder who refuses to explain their decisions. Expensive and useless. The risk scores it calculated were consistently wrong. Not wildly wrong, just wrong enough to matter. Off by 3-7% every time. For a 10,000-member population, that's millions in misestimated revenue. When we asked why, they said the algorithm was "complex." Complex doesn't mean correct. The Integration Nightmare "Seamless integration" turned into six months of consultants trying to make our seven systems talk to one black box that spoke its own language. Patient IDs didn't match. Date formats conflicted. Diagnosis codes came through corrupted. We spent $75,000 on integration fixes for a system that was supposed to integrate seamlessly. The real killer? Updates. Every time any connected system updated, something broke. EHR upgrade? Risk adjustment software stops pulling charts. Claims system patch? Risk scores disappear. We spent more time fixing connections than using the actual software. The Report Nobody Wanted The software generated 47 different reports. Beautiful, colorful, completely useless reports. We needed to know three things: What needs coding? What got coded? What are we missing? Instead, we got "Hierarchical Condition Category Velocity Trending Analysis" and "Prospective Risk Stratification Heat Maps." I still don't know what those mean. Creating a simple list of completed charts required exporting three reports, combining them in Excel, and manually filtering. The "one-click reporting" they promised required approximately 47 clicks and a prayer. My favorite feature was the executive dashboard that showed real-time coding productivity. Except it wasn't real-time (24-hour delay), and the productivity metrics measured things nobody cared about. Executives wanted revenue impact. They got colorful circles showing "coding velocity vectors." The Excel Solution After eight months of suffering, Jenny from IT built us a replacement in Excel and Access. Took her three weeks. Cost nothing but overtime pizza. It's ugly. It's basic. It does exactly what we need and nothing else. Charts come in, get assigned based on simple rules, coders review them, codes get tracked. No AI. No algorithms. No intelligence. Just functional simplicity. Betty can explain exactly how it calculates risk scores because she can see the formulas. When something breaks, Jenny fixes it in an hour, not three weeks of vendor support tickets. When we need a new report, we build it ourselves. The homemade system is 200% faster than the expensive software. Not because it's sophisticated, but because it matches how we actually work instead of forcing us to match how it works. Your Software Reality Check Time how long it takes to code one chart in your risk adjustment software, including every click, screen load, and system navigation. Now time the same task in Excel. If Excel is faster, you've got a problem. Ask three coders to explain how your software calculates risk scores. If you get three different answers (or three confused looks), you're trusting math nobody understands. Count how many workarounds your team has created. External spreadsheets? Manual tracking documents? Post-it note systems? Each workaround proves the software doesn't actually work for real humans doing real work. The best risk adjustment software isn't the smartest or most features-rich. It's the one that gets out of the way and lets coders code. Everything else is expensive friction that makes simple tasks complex and complex tasks impossible.

Recent Posts

  • Golden Bay Beach Hotel: My Stay Where Larnaca’s Shoreline Redefines Five-Star Calm
  • How to Find the Right Heating Contractor for Your Project
  • The Importance of Sleep in Addiction Recovery
  • Starting Your Professional Life in a New Country: The First 90 Days
  • Must-Try Culinary Experiences on a Spain and Portugal Tour

categories

Copyright © 2025 · All rights reserved. Disclosure Policy. Contact Us: Kelli@masonjarbreakfast.com