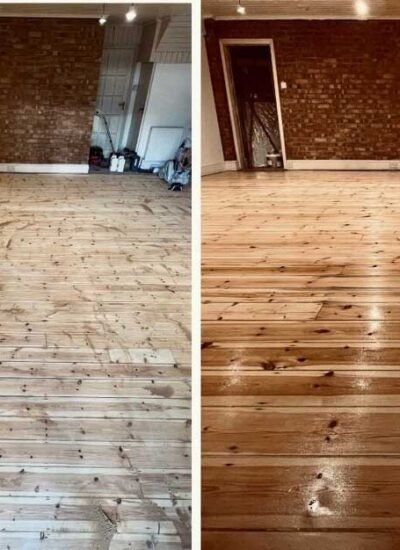
The Timeless Charm of Original Wood Floors
There’s something undeniably special about original wood floors. They tell stories, carry character, and bring a timeless charm that modern materials just can’t replicate. As someone who has walked through hundreds of homes across Bakersfield, California—including many with worn, scratched, or painted-over hardwood—I’ve learned the value of preserving and restoring what’s already there.
I’m Joy Gebarah, owner of Kernvestors, a company that buys houses fast for cash in Bakersfield. Over the years, I’ve seen how a refinished wood floor can completely change the feeling of a room. Whether you’ve just moved into a fixer-upper or are prepping your home for sale, refinishing original hardwood is one of the most satisfying DIY projects you can take on.
How to Bring Your Floors Back to Life
Here’s how you can bring those floors back to life.
Step 1: Evaluate the Floor’s Condition
Before renting any equipment or ripping out carpets, take a close look at the wood underneath. Are there deep gouges? Water damage? Pet stains? Floors that are structurally sound but just scratched or dull are perfect candidates for refinishing. However, if the boards are warped, stained through, or too thin from previous sanding, you might need to consult a pro or consider a replacement.
In many of the homes I buy, especially older ones in Central Bakersfield, the wood floors have been covered up for decades. Peeling back the carpet or linoleum to reveal vintage oak or pine is always a great moment.
Step 2: Gather Your Tools and Materials
You’ll need:
- A drum or orbital sander (available at most rental centers)
- Sandpaper in various grits (typically 36, 60, 80, and 100)
- A floor edger for corners and edges
- A shop vacuum
- Wood filler (optional)
- Stain (if changing color)
- Polyurethane or another finish
- Applicators (foam rollers, brushes, or lambswool applicators)
Don’t skimp on safety gear. A dust mask, eye protection, and earplugs are essential.
Step 3: Prep the Room
Clear everything out of the room, including baseboards if you plan to refinish right up to the walls. Tape off vents, doorways, and anything you want to protect from dust. Make sure you have good ventilation, especially if using oil-based products.
In older homes I purchase, prepping sometimes takes longer than the sanding itself—especially if there’s glue or stubborn padding stuck to the floor. Take your time here. A clean workspace equals a better finish.
Step 4: Sand the Floor
This is where the magic begins. Start with a coarse grit (like 36) to remove the old finish, scratches, and any minor stains. Progress through finer grits—60, then 80, then 100—to smooth everything out. Work in the direction of the wood grain whenever possible.
Use the edger to get into corners and along walls. It’s tedious work, but skipping this part leaves a halo of unrefinished wood around the room.
Vacuum thoroughly between grits to remove all dust.
A tip from experience: If you’re refinishing floors in a home you’re flipping or renting out, try to do it before any paint or trim work. It’s much easier to clean up afterward.
Step 5: Fill Gaps and Imperfections
If your floors have small cracks or gaps, now’s the time to fill them. Use a wood filler that matches your floor’s color, or mix dust from your final sanding with wood glue to create a custom match. Let it dry completely before doing a final light sanding pass.
In many of the houses I restore, especially in the older neighborhoods like Oleander and Westchester, some gaps just come with the territory. Unless you’re going for a perfect showroom floor, a few imperfections can add to the charm.
Step 6: Apply the Stain (Optional)
If you love the natural tone of your floors, skip this step. But if you want to darken or change the color, now’s the time. Test the stain in a closet or inconspicuous corner first.
Use a clean rag or applicator to apply the stain in the direction of the grain. Wipe off any excess and let it dry according to the manufacturer’s instructions. Don’t rush this—uneven stain can ruin all your hard work.
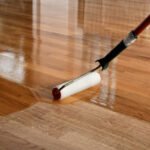
Step 7: Seal the Floor
The final step is applying a protective finish. Most people use polyurethane—available in water-based (faster drying, less smell) or oil-based (more durable, but longer drying time). Apply with a high-quality applicator, following the grain.
Let each coat dry fully, then lightly buff or sand with a fine grit before applying the next coat. Usually, 2–3 coats is ideal.
Pro tip: Some of my best returns on renovated homes have come from showcasing refinished hardwood under natural light with a satin or semi-gloss finish. It really sells.
Step 8: Let It Cure
Even after the finish dries, don’t rush furniture back in. Give it at least 48–72 hours to cure before walking on it with shoes, and a week or more before placing rugs or heavy items.
Final Thoughts from the Field
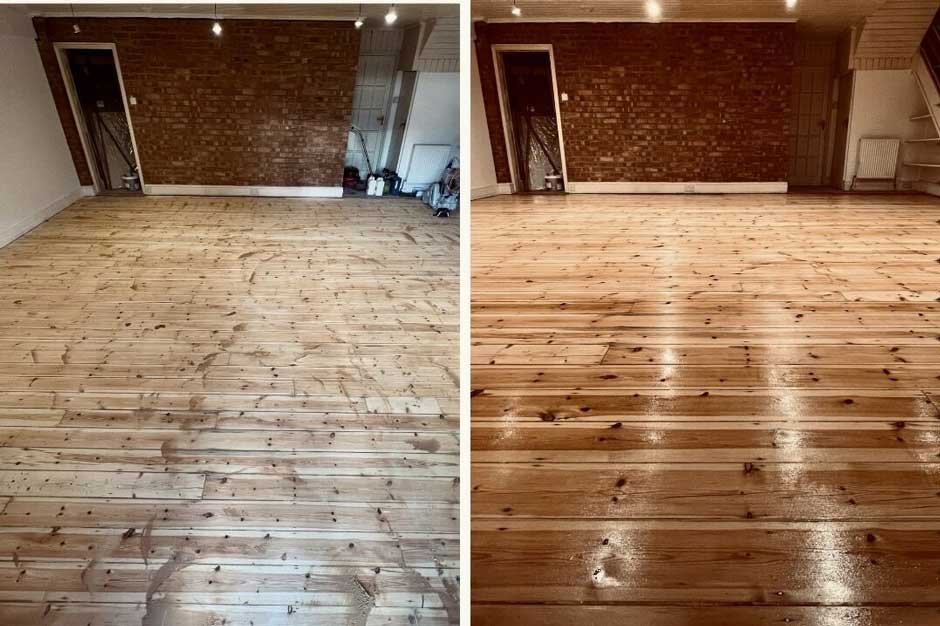
Refinishing wood floors takes elbow grease, patience, and attention to detail. But the payoff? Huge. You’ll get a richer, warmer, more valuable home. Whether you’re living in it or selling, there’s something powerful about bringing those original features back to life.
At Kernvestors, we walk into homes all over Bakersfield—some in pristine condition, others with floors buried under years of neglect. Time and again, I’ve seen how taking the time to refinish hardwood can tip the scale on a sale or transform a space from worn to wonderful. And while we buy homes as-is, when owners do take the step to refinish their floors, it adds undeniable beauty and pride to the property.
If you’re unsure about the process or the condition of your floors, don’t be afraid to ask questions or hire a pro for at least the sanding phase. But if you’re up for the challenge, refinishing your wood floors is one of the best DIY investments you can make.
So roll up your sleeves, fire up the sander, and bring your home’s history back into the light. You won’t regret it.
— Joy Gebarah is the owner of Kernvestors, a local home investment company in Bakersfield, California that specializes in buying homes fast and as-is. Her team has worked with hundreds of properties throughout the Central Valley, helping homeowners move forward with confidence—floor to ceiling.


Leave a Reply