Mason Jar Breakfast

Not Your Grandma's Mason Jar Anymore!

  • Home
  • Recipes
    • Mason Jar Breakfast
    • Mason Jar Lunch
    • Mason Jar Dinner
    • Mason Jar Dessert
  • Crafts
  • Décor
  • Gifts
  • Beauty
  • About
  • Shop
  • Others
    • Auto
    • Business
    • Fashion
    • Food & Beverage
    • Health
    • Home Improvement
    • Immigration & Investment
    • Lifestyle
    • SEO Digital
    • Tech
    • Travel
9 Kitchen Habits That Age Your Home Faster

9 Kitchen Habits That Age Your Home Faster

Food & Beverage Leave a comment

Your kitchen is one of the hardest-working areas in your home, and over time, that daily wear and tear starts to show. But what if some of the biggest culprits behind your kitchen’s aging were everyday habits? The good news is that a little awareness—and a few smart fixes—can help reverse the damage and keep your kitchen looking fresh for years to come, notes Sun-Pro Realty and Management Services.

Here are some kitchen habits that could be making your home age faster—and what to do about them.

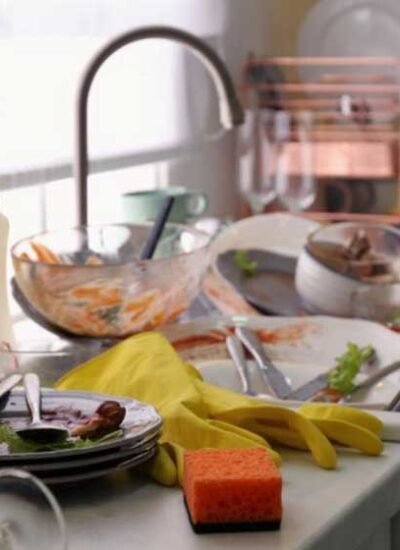
1. Forgetting to Maintain the Garbage Disposal

The Problem: Your garbage disposal is an unsung hero in the kitchen—until it starts acting up. Letting food waste, grease, or hard items like bones go down the drain can lead to clogs, odors, and even motor failure. A neglected disposal system can also cause plumbing issues, which may lead to expensive repairs down the road.

How to Fix It:

  • Avoid putting fibrous foods, grease, and coffee grounds down the disposal.
  • Run cold water before, during, and after using the disposal to flush food particles through.
  • Clean it regularly by grinding ice cubes and citrus peels to keep blades sharp and odors at bay.
  • When your disposal is making strange noises, draining slowly, or producing bad smells despite cleaning, it may need professional repair or replacement.

If you suspect your system needs a tune-up, get tips and solutions from Travis County Appliance Repair for a well-maintained garbage disposal.

2. Ignoring Water Damage Around the Sink

The Problem: Water splashes from dishwashing, leaky faucets, and damp sponges might seem harmless, but they can lead to warped wood, stained cabinets, and even mold growth over time. Water damage is one of the biggest contributors to an old-looking kitchen.

How to Fix It:

  • Wipe up water spills immediately—especially around the edges of the sink.
  • Check under the sink regularly for leaks and moisture buildup.
  • Install a splash guard or use an absorbent mat near the sink to prevent water from seeping into cabinets.
  • If you already see signs of damage, consider resealing or refinishing the affected areas before the problem worsens.

3. Letting Grease Build Up on Cabinets and Walls

The Problem: Cooking produces invisible grease particles that settle on kitchen surfaces. Over time, they create a sticky film that attracts dust and dirt, making cabinets look dull and yellowed.

How to Fix It:

  • Wipe down cabinets and walls weekly with a gentle degreaser or a vinegar-and-water solution.
  • Use range hood vents when cooking to trap grease before it settles on surfaces.
  • For stubborn buildup, a mixture of baking soda and warm water can help break down sticky grease.

4. Using Harsh Cleaners on Countertops

The Problem: Some cleaning products can be too aggressive for kitchen surfaces, especially natural stone, laminate, and wood. They can strip away protective coatings, causing discoloration and premature wear.

How to Fix It:

  • Avoid using bleach, ammonia, or abrasive cleaners on delicate surfaces.
  • Stick to mild dish soap, water, and pH-balanced cleaners designed for your countertop material.
  • If countertops are already showing damage, consider resealing them (for stone surfaces) or applying a protective oil treatment (for wood).

5. Overloading Cabinets and Drawers

The Problem: We’ve all been guilty of stuffing cabinets to the brim. But too much weight can cause shelves to warp, hinges to loosen, and drawers to stick—making your kitchen look and feel worn out.

How to Fix It:

  • Declutter your kitchen storage at least once a year. Donate or discard items you don’t use.
  • Use shelf liners and dividers to organize items without overloading one area.
  • If cabinet doors are sagging or drawers are misaligned, tighten hardware or install soft-close hinges to prolong their life.

6. Using the Wrong Cutting Board (or Skipping It Altogether!)

The Problem: Chopping directly on countertops can leave deep scratches, especially on laminate and wood surfaces. These scratches become a breeding ground for bacteria and make countertops look damaged and worn.

How to Fix It:

  • Always use a cutting board to protect your counters.
  • Choose a material that’s gentle on knives but durable enough for everyday use, like wood or plastic.
  • If countertops are already scratched, consider sanding and resealing them or using a decorative cutting board to cover the damage.

7. Not Replacing Old Caulk and Grout

The Problem: Caulk around sinks and grout between tiles can become stained, cracked, or moldy, making the kitchen look older than it really is.

How to Fix It:

  • Inspect caulk and grout every six months for signs of wear.
  • Remove and replace old and discolored caulk with a fresh bead to prevent moisture damage.
  • Scrub grout lines with a baking soda and hydrogen peroxide paste to remove stains and restore brightness.

8. Letting Natural Light Fade Surfaces

The Problem: While natural light brightens up a kitchen, prolonged exposure to direct sunlight can fade wood floors, cabinets, and even countertops over time.

Click here for tips on great window options.

How to Fix It:

  • Install UV-blocking window films or sheer curtains to filter harsh sunlight.
  • Rotate rugs and furniture occasionally to prevent uneven fading.
  • If fading has already occurred, refinishing or repainting cabinets and floors can help restore their appearance.

9. Skipping Regular Appliance Maintenance

The Problem: A kitchen’s efficiency depends on its appliances, yet many homeowners forget to clean or maintain them until something goes wrong. A poorly maintained oven, fridge, or dishwasher not only shortens the appliance’s lifespan but also affects the overall functionality of your kitchen.

How to Fix It:

  • Clean refrigerator coils every six months to improve energy efficiency.
  • Run an empty cycle with vinegar in your dishwasher monthly to remove buildup.
  • Check oven seals and replace them if heat is escaping.
  • For appliances that are slow, noisy, or underperforming, professional maintenance can help avoid costly replacements.

Keep Your Kitchen Young

Your kitchen doesn’t have to age before its time. By breaking these common habits and making small changes, you can extend the life of your kitchen and keep it looking—and functioning—like new. Regular maintenance, smart cleaning choices, and a little TLC go a long way in preserving one of the most important spaces in your home.

Related Posts

  • Important Equipment in the Commercial Kitchen
    6 Most Important Equipment in the Commercial Kitchen

    The marketable kitchen serves as the backbone of any food service business, where effectiveness and…

  • Top-Four-Key-Reasons-Your-Home-Deserves-Expert-Cleaning-Today
    Top Four Key Reasons Your Home Deserves Expert Cleaning Today

    Curious if hiring professional cleaners is worth it? You’re not alone! While many consider tackling…

  • A Foodie’s Guide to Keeping Your Kitchen Cooking-Ready

    For foodies and home cooks, the kitchen is the heart of the home. It’s where…

  • Siding-in-Winchester
    Siding in Lexington: Expert Solutions Will Improve the Outside of Your Home

    Regarding improving the structural integrity and visual attractiveness of your house, siding in Lexington is rather…

Filed Under: Food & Beverage

Leave a Reply Cancel reply

Your email address will not be published. Required fields are marked *

Hi, I'm Yetta. I love having dance parties in the kitchen with my family, traveling, and Mason jar creations.

Follow on Facebook Follow on Pinterest Follow on Twitter Follow on Instagram

Recent Posts

Avoiding Common Mistakes During Estate Administration
Women In Recovery Often Face Different Pressures, Here Are Five That Shape The Journey
What Are Some Menu Staples of American Grills?
The Rider’s Roadmap: Planning Motorcycle Transport for Your Next Big Move For many riders, a motorcycle is more than just a vehicle. It represents freedom, independence, and countless miles of adventure. When it comes time to move to a new city or region, however, transporting a motorcycle requires careful planning. Whether relocating for work, education, or a lifestyle change, ensuring your bike arrives safely at its new destination is an important part of the process. Planning motorcycle transport properly helps protect your bike, reduce stress during the move, and ensure that once you arrive, your motorcycle is ready to hit the road again. Decide Whether to Ride or Ship Your Motorcycle The first step in planning motorcycle transport is deciding whether to ride the bike to your new location or arrange transport. While riding may seem like the most natural option, long-distance journeys can sometimes be impractical. Factors such as the distance, time constraints, weather conditions, and the amount of luggage you need to carry can all influence this decision. For riders relocating across the country or managing a busy move, shipping the motorcycle can often be the safer and more convenient choice. Transporting the bike separately allows riders to travel more comfortably while ensuring the motorcycle is handled with care. Explore Different Motorcycle Transport Options Motorcycles can be transported using several different methods. Each option has advantages depending on your situation. One option is transporting the motorcycle yourself using a van or trailer. This approach provides control over the process but requires the correct equipment and knowledge of how to secure the bike safely. Another option is using professional motorcycle transport services. These companies specialise in vehicle delivery and typically use vans or trailers designed specifically for motorcycles. Many riders prefer this approach because it reduces the risks associated with loading, securing, and transporting the bike themselves. Prepare Your Motorcycle for Transport Before your motorcycle is collected or loaded for transport, it is important to prepare it properly. Cleaning the bike is a good first step, as it makes it easier to identify any existing scratches or damage. It is also wise to remove any loose accessories such as tank bags, phone mounts, or detachable luggage. These items could move during transport and cause unnecessary damage. Taking photographs of the motorcycle before transport is also recommended. Documenting the bike’s condition provides reassurance and can be useful if any issues arise during delivery. Ensure the Motorcycle Is Properly Secured If you are transporting the motorcycle yourself, securing it correctly is essential. Motorcycles should be loaded carefully using a ramp and positioned in a stable location within the vehicle or trailer. Strong ratchet straps should then be used to secure the bike to fixed anchor points. Wheel chocks can help stabilise the front wheel and prevent movement during transit. Proper securing prevents the motorcycle from shifting or tipping while the transport vehicle is in motion. Choose a Reliable Transport Service When choosing a professional transport provider, reliability and experience should be key considerations. Motorcycle transport requires specialised handling, so it is important to work with companies that understand how to move bikes safely. Reading customer reviews, comparing quotes, and confirming insurance coverage can help ensure you select a trustworthy service. For riders relocating within the UK, services offering Cheshire motorcycle shipping can help connect owners with experienced transport providers who specialise in moving motorcycles securely between locations. Plan Delivery Logistics in Advance Motorcycle transport should be coordinated with the overall moving schedule. Planning delivery timing ensures that someone is available to receive the motorcycle once it arrives at the new location. It is also helpful to confirm whether the transport company offers door-to-door delivery or requires collection from a depot. Ensuring the delivery location is accessible for transport vehicles helps prevent delays. Careful planning allows the transport process to fit smoothly into the rest of your relocation. Protect Your Motorcycle Investment Motorcycles often represent both a financial investment and a personal passion. Taking steps to protect the bike during a move helps ensure it arrives in the same condition it left. This includes choosing a reputable transport service, preparing the motorcycle carefully, and confirming that the transport company provides insurance coverage during transit. These precautions help minimise risks and provide peace of mind throughout the moving process. Final Thoughts Relocating to a new place is an exciting chapter, and bringing your motorcycle along ensures the adventures can continue wherever you go. By planning transport carefully, riders can protect their bikes and avoid unnecessary complications during the move. From preparing the motorcycle to selecting the right transport provider, each step plays a role in ensuring a smooth transition. With the right planning in place, your motorcycle will be waiting for you at your new destination, ready for the next journey ahead.
5 Smart Ways to Keep Your Home Bar Setup Organised
how-japans-collectible-vending-trend-is-revolution-1

Recent Posts

  • Avoiding Common Mistakes During Estate Administration
  • Women In Recovery Often Face Different Pressures, Here Are Five That Shape The Journey
  • What Are Some Menu Staples of American Grills?
  • The Rider’s Roadmap: Planning Motorcycle Transport for Your Next Big Move
  • 5 Smart Ways to Keep Your Home Bar Setup Organised

categories

Copyright © 2026 · All rights reserved. Disclosure Policy. Contact Us: Kelli@masonjarbreakfast.com